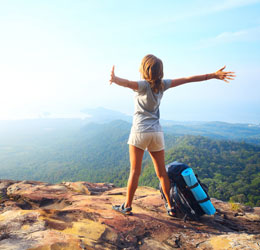
The pursuit of extraordinary landscape photography has evolved beyond simply pointing a camera at scenic vistas. Today’s discerning photographers seek transformative experiences that combine technical mastery with intimate knowledge of the world’s most spectacular natural environments. These specialised photography expeditions offer unprecedented access to remote locations, optimal shooting conditions, and expert guidance that can elevate your craft from amateur snapshots to professional-quality imagery.
Modern landscape photography trips represent a convergence of adventure travel, technical education, and artistic development. Unlike conventional tourism, these carefully orchestrated journeys prioritise photographic opportunities above comfort, positioning participants in the right place at precisely the right moment to capture nature’s most fleeting displays. The investment in such experiences often yields dividends that extend far beyond the trip itself, fundamentally changing how you approach composition, light, and storytelling through imagery.
The growing popularity of photography-focused travel reflects a broader shift in how we value experiences over possessions. Professional guides who understand both the technical aspects of photography and the nuanced behaviour of natural light can transform challenging shooting conditions into opportunities for creating truly exceptional work. These expeditions attract photographers who recognise that the most compelling landscapes often require significant effort, patience, and local knowledge to access and capture effectively.
Essential camera equipment and technical specifications for landscape photography expeditions
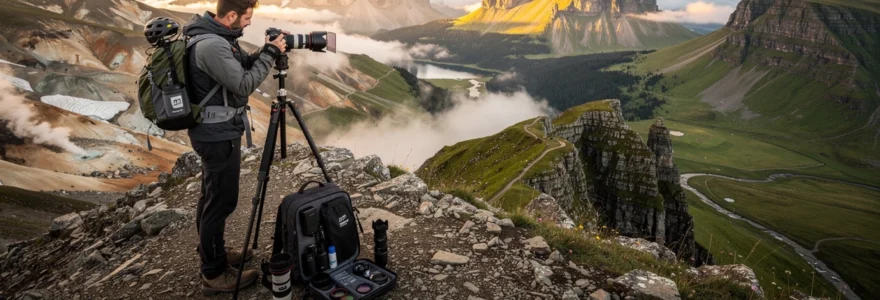
The demanding nature of landscape photography expeditions requires equipment that can withstand harsh environmental conditions whilst delivering exceptional image quality. Your camera system becomes your most critical tool for translating vision into reality, making careful selection and preparation absolutely essential for success in remote locations.
Full-frame sensor cameras: canon EOS R5 vs nikon Z7 II performance analysis
Full-frame sensors remain the gold standard for landscape photography due to their superior light-gathering capabilities and exceptional dynamic range. The Canon EOS R5 delivers remarkable 45-megapixel resolution with industry-leading image stabilisation, making it particularly effective for handheld shooting in challenging conditions. Its weather sealing proves invaluable during extended outdoor expeditions, whilst the high-resolution electronic viewfinder provides accurate exposure preview in variable lighting conditions.
The Nikon Z7 II offers comparable performance with slightly different strengths, including superior battery life and more intuitive menu systems for field operation. Its 45.7-megapixel sensor produces exceptionally detailed files with excellent colour reproduction, particularly beneficial when capturing subtle tonal variations in golden hour lighting. Both systems excel in different scenarios, with the Canon offering slight advantages in low-light performance and the Nikon providing more consistent autofocus accuracy across diverse lighting conditions.
Wide-angle lens selection: 14-24mm f/2.8 vs prime lens advantages
Wide-angle lenses form the backbone of landscape photography, enabling photographers to capture expansive vistas whilst maintaining sharp focus from foreground to infinity. The versatility of a 14-24mm f/2.8 zoom lens provides flexibility for varying compositions without requiring lens changes in dusty or wet conditions. This focal range covers the sweet spot for most landscape scenarios, from intimate foreground details to sweeping panoramic views.
Prime lenses, particularly the 16mm f/1.4 and 20mm f/1.4 options, offer superior optical quality with reduced distortion and improved sharpness across the frame. Their wider maximum apertures prove advantageous for astrophotography components of landscape trips, whilst their compact size reduces carrying weight during extended hiking sessions. The choice between zoom versatility and prime quality often depends on specific trip requirements and personal shooting preferences.
Tripod stability systems: carbon fibre vs aluminium for mountain photography
Tripod selection represents a critical balance between weight, stability, and durability for landscape photography expeditions. Carbon fibre systems offer significant weight advantages, typically reducing overall load by 30-40% compared to equivalent aluminium models. This weight reduction becomes crucial during multi-day hiking expeditions where every gram matters for photographer comfort and endurance.
Aluminium tripods provide superior vibration damping and often feature more robust leg locking mechanisms that perform reliably in sandy or wet conditions. Their lower cost makes replacement less concerning in remote locations where equipment damage risks are elevated. Professional expedition photographers often choose carbon fibre for alpine environments where weight savings are paramount, whilst
combine them with a heavier, more affordable aluminium option when working closer to the vehicle or in coastal locations where salt spray can corrode carbon fibre over time. Whatever material you choose, look for a tripod with independent leg angle adjustment, a solid ball head with a high load rating, and spikes that can be deployed in snow, sand or soft ground. A reliable tripod is not just a support; during long exposures in remote locations, it becomes the foundation that determines whether your unique landscape images are critically sharp or disappointingly soft.
Graduated neutral density filter systems: lee filters vs breakthrough photography
Graduated neutral density (GND) filters remain indispensable for balancing bright skies against darker foregrounds in landscape photography. Systems from Lee Filters and Breakthrough Photography both offer high optical clarity, colour neutrality and robust construction suitable for demanding expeditions. When you are photographing high-contrast scenes at sunrise or sunset, a well-chosen GND can preserve highlight detail in the clouds without forcing you to underexpose the land.
Lee Filters have long been favoured by landscape specialists for their comprehensive range of soft, medium and hard-edge gradations, along with versatile 100mm holder systems. Breakthrough Photography, by contrast, focuses on ultra-low colour cast and advanced multi-coating that repels water, oil and dust—features that become invaluable in rain, sea spray or blowing sand. For remote trips where you cannot easily clean or replace gear, the extra resilience of nano-coated filters can make the difference between consistent results and constant maintenance. Many expedition photographers carry a hybrid kit: a Lee system for its broad ecosystem and a few key Breakthrough filters where maximum colour accuracy is critical.
Slot-in filter systems remain more flexible than screw-in alternatives, especially when combining GNDs with polarizers or solid ND filters for long exposures. However, they require more careful handling in strong winds or on exposed ridges. Before departing for a major photography trip, it is worth practising filter changes with gloves on and in low light, as you will often be working during cold pre-dawn conditions. Remember that the best landscape photography gear is the equipment you can operate confidently and quickly when the light changes unexpectedly.
Weather protection gear: peak design rain covers and lens hood configurations
Harsh weather is often the secret ingredient behind truly distinctive landscape images, but it also poses significant risks to your equipment. Weather protection systems such as Peak Design rain covers provide a lightweight, packable solution that can be deployed in seconds when showers or snow squalls roll in. Their fitted design maintains access to camera controls and viewfinder, allowing you to keep shooting rather than retreating to shelter the moment conditions turn dramatic.
Lens hoods play a more important role than many photographers realise on landscape expeditions. Beyond improving contrast by blocking stray light, they offer a first line of defence against drizzle, sea spray and accidental impacts. In driving rain or when shooting waterfalls, pairing a deep lens hood with a microfibre cloth and a simple “tilt and wipe” technique helps you keep the front element clear between exposures. For ultra-wide lenses where standard hoods offer limited protection, a combination of a rain cover and careful body positioning (sheltering the front element with your own frame) can be surprisingly effective.
You should also consider secondary weather defences such as dry bags within your main pack, silica gel packs to absorb moisture overnight, and lens cloths stored in waterproof pouches. In cold environments, a simple rule applies: if you protect your gear as carefully as you protect yourself, you will be able to keep working when others are forced to pack up. Unique landscape photography often comes from those marginal conditions when storms are clearing or rolling in; robust weather protection is what lets you stay out there long enough to capture them.
Prime landscape photography destinations and optimal shooting conditions
Choosing the right destination is as important as choosing the right camera when planning photography trips focused on capturing unique landscapes. Each region presents its own visual language, climate patterns and logistical challenges, all of which influence how you plan shoots and what gear you prioritise. By understanding the optimal seasons, time-of-day windows and specific micro-locations within each area, you dramatically increase your chances of returning with portfolio-quality images rather than generic travel snapshots.
While iconic viewpoints are always tempting, the most memorable landscape photographs often come from exploring just beyond the classic compositions. Working with local guides or experienced tour leaders who know how the light moves across the terrain allows you to discover fresh perspectives on even the most-photographed landmarks. As you evaluate potential destinations, consider not only their headline attractions but also their diversity of subjects, accessibility in changing weather, and the potential for both grand vistas and intimate details.
Iceland’s highlands: landmannalaugar rhyolite mountains and geothermal formations
Landmannalaugar, at the heart of Iceland’s Highlands, offers one of the most otherworldly landscapes on the planet. The region’s multicoloured rhyolite mountains, braided river systems and steaming geothermal vents create a surreal canvas for landscape photography trips focused on unique terrain. The prime season runs from late June to early September, when highland roads become accessible and snow retreats from the higher passes, revealing complex patterns of coloured rock and moss.
Optimal shooting conditions often occur on days with broken cloud and intermittent sun, which accentuate the pastel hues of the rhyolite slopes and the deep greens of the mossy lava fields. Early morning and late evening light skim across the ridges, revealing textures that are invisible under midday sun. From elevated vantage points above the main valley, you can compose sweeping vistas that integrate sinuous rivers as leading lines, guiding the viewer’s eye into the heart of the highlands.
Weather in Iceland’s interior is notoriously volatile, so successful trips require flexible itineraries and careful monitoring of mountain forecasts and F-road conditions. Strong winds and fast-moving weather fronts can transform scenes in minutes, offering dramatic skies one moment and dense fog the next. To make the most of these shifting conditions, you will need both physical readiness for rugged hiking and mental agility to adapt compositions quickly when unexpected light breaks through the clouds.
Patagonia’s torres del paine: cuernos del paine golden hour compositions
Patagonia’s Torres del Paine National Park is synonymous with jagged granite spires, turquoise lakes and rapidly changing weather—a dream combination for adventurous landscape photographers. The Cuernos del Paine, with their distinctive layered rock formations, provide particularly striking subjects at golden hour. The best time to visit for landscape photography is typically between October and April, when daylight hours are longer and trails are more accessible, though shoulder seasons offer quieter conditions and often more interesting skies.
Sunrise tends to be the most rewarding time for capturing the Cuernos, as warm light strikes the peaks from the east while the foreground remains in cool shadow, creating natural colour contrast. Classic travel photography compositions can be found along the shores of Lake Pehoé and Lake Nordenskjöld, where calm mornings occasionally yield mirror-like reflections. On windier days—common in Patagonia—you can embrace the chop and use long exposures to smooth the water, allowing the mountains to stand in sharp relief against soft, blurred textures.
Because the weather is so dynamic, you should plan multiple sessions at key locations rather than relying on a single visit. Low cloud can partially obscure the peaks, adding mystery and scale, while lenticular clouds often form above the massif, especially during periods of strong atmospheric instability. These “flying saucer” clouds can become the main subject of your composition, turning an already dramatic landscape into something truly unforgettable. Flexibility and patience are essential; in Patagonia, those willing to wait out four seasons in a day are the ones who come home with rare images.
Dolomites via ferrata routes: seceda ridge and alpe di siusi sunrise positions
The Italian Dolomites combine accessible infrastructure with genuinely wild alpine scenery, making them ideal for photography trips focused on capturing unique mountain landscapes. Seceda Ridge and Alpe di Siusi (Seiser Alm) are two standout locations that reward early starts and careful planning. Late spring through early autumn offers the most reliable access, while autumn in particular brings colourful larch forests and often mist-filled valleys beneath crystal-clear peaks.
Seceda Ridge can be reached via cable car in season, followed by short hikes along the crest, or via longer via ferrata routes for more adventurous photographers comfortable with exposure. Sunrise here is spectacular, with first light striking the serrated limestone walls and casting long shadows into the rolling pasture below. By moving along the ridge rather than staying at a single viewpoint, you can experiment with side-lighting, backlight silhouettes, and compressed telephoto perspectives that reveal the scale and layering of the range.
Alpe di Siusi offers a different but equally compelling character: a vast high-altitude meadow dotted with wooden huts and framed by dramatic peaks. Mist often pools in the lower depressions at dawn, creating ethereal scenes where cabins appear to float above soft white blankets. Optimal shooting positions vary with the movement of the mist and the position of the rising sun, so arriving well before blue hour to scout compositions is crucial. Here, a combination of wide-angle lenses for grand scenes and longer focal lengths for isolating huts or overlapping hill shapes will help you fully exploit the location.
Scottish highlands: isle of skye’s quiraing formation and storr rock pinnacles
The Scottish Highlands, and the Isle of Skye in particular, offer a moodier, more atmospheric flavour of landscape photography. The Quiraing and the Old Man of Storr are among the most iconic formations, yet they still reward photographers who seek fresh angles and are willing to hike beyond the usual lookout points. Late autumn through early spring often brings the most dramatic light and weather, though it also demands robust clothing, headlamps and careful navigation skills.
The Quiraing is at its best in soft side light when low sun skims across the terraced escarpments, revealing subtle contours and casting long shadows. Morning conditions are generally preferable, especially when low cloud hangs in the surrounding glens and slowly lifts to reveal the landscape in stages. By moving along the circuit path and varying your elevation, you can use rock outcrops, lone trees and winding tracks as leading lines that draw the viewer into the wider scene.
The Old Man of Storr rewards both sunrise and blue-hour sessions, particularly when broken cloud allows shafts of light to strike the pinnacles while the background remains in shade. Fog can transform the area into an almost abstract landscape, with rock spires appearing and disappearing as visibility shifts. Because Skye’s weather is highly unpredictable, planning multiple attempts and maintaining a flexible schedule will greatly increase your chances of catching those fleeting moments when light, cloud and landscape align perfectly.
Advanced composition techniques for unique landscape capture
Technical mastery of camera gear is only half the equation in landscape photography; composition is what turns competent exposures into compelling images. On dedicated photography trips, you have the luxury of time to refine your framing, adjust your position and experiment with different visual narratives. Rather than firing a few quick frames and moving on, you can treat each scene like a visual puzzle, asking how foreground, midground and background elements can work together to guide the viewer’s eye.
Advanced composition techniques are especially valuable when shooting well-known locations, where the obvious viewpoints have been photographed thousands of times. By applying methods such as precise hyperfocal focusing, focus stacking, and deliberate use of leading lines and asymmetrical balance, you can create interpretations that feel personal and distinctive. Think of these techniques as tools in a creative toolbox—you will not use all of them in every scene, but knowing when and how to deploy each one is what separates thoughtful work from formulaic images.
Hyperfocal distance calculations for maximum depth of field
In many landscape compositions, you will want everything from the closest rock to the distant mountains to appear sharp. Hyperfocal distance focusing is the most efficient way to achieve this without resorting to extremely small apertures that introduce diffraction. In simple terms, the hyperfocal distance is the focus point that maximises depth of field from roughly half that distance all the way to infinity at a given aperture and focal length.
While technical charts and mobile apps can give you precise numbers, a practical field approach is often more useful on a windswept ridge or busy shoreline. For example, when shooting at 16–24mm on a full-frame camera at f/11, focusing roughly one-third of the way into the scene—usually on a strong midground element—will often place you near the hyperfocal distance. You can then use your camera’s depth-of-field preview or magnified live view to fine-tune focus and ensure critical sharpness where it matters most.
Hyperfocal distance techniques become particularly powerful in low-light landscape photography when you cannot easily rely on autofocus. Pre-focusing during blue hour and then locking focus, or using manual focus with a well-marked lens barrel, allows you to keep shooting confidently as light levels fall. Like learning a musical scale, understanding hyperfocal relationships may feel technical at first, but once internalised, it becomes second nature and frees you to focus more on creative decisions.
Focus stacking methods for foreground-to-infinity sharpness
There are situations—especially with ultra-wide lenses and very close foreground elements—where even optimal hyperfocal focusing cannot deliver uniform sharpness from front to back. This is where focus stacking comes in. By capturing a series of images with focus set at progressively greater distances, then blending them in post-processing, you can create a final photograph with apparent infinite depth of field without resorting to extreme apertures.
In the field, effective focus stacking starts with a stable tripod and careful planning. You might begin by focusing on the closest foreground detail you want tack-sharp, then capture successive frames as you move the focus point through the midground and towards the horizon. Typically, three to seven frames are sufficient for most landscape scenes. To avoid visible transitions between focus planes, maintain consistent exposure and composition, using a remote release or self-timer to minimise movement.
Back at your computer, software like Adobe Photoshop or dedicated stacking tools can align and blend your images automatically. While the process adds an extra step to your workflow, the results can be transformative, especially when you are photographing intricate foreground textures such as wildflowers, ice patterns or rock details. Focus stacking is like combining multiple perspectives into a single, cohesive view of the landscape—something impossible to achieve with a single exposure alone.
Leading line integration through natural rock formations
Leading lines are one of the most powerful compositional tools in landscape photography, subtly directing the viewer’s gaze through the frame toward the main subject. In wild environments, these lines are often formed by natural rock formations, river channels, shoreline curves or mountain ridges. The key is learning to recognise these shapes in three dimensions and then moving your position until they create a coherent, flowing path within the two-dimensional frame.
For example, in Iceland’s highlands you might use a sinuous lava ridge to guide the eye from the bottom of the frame towards distant rhyolite peaks. In the Dolomites, a diagonal line of limestone slabs can lead directly to a dramatic spire. The process is similar to arranging furniture in a room: small shifts of a few metres left, right, up or down can radically change how the pieces relate to each other. Rather than accepting the first composition you see, walk the scene, crouch low, and look for angles where natural lines converge towards your focal point.
When you are working in busy or chaotic terrain, such as boulder fields or eroded cliffs, leading lines help impose visual order. They give the viewer a clear “entry point” into the image and a sense of journey through the landscape. If you find yourself unsure where to place your camera, ask a simple question: which natural shapes in this scene could act as pathways for the eye? This mental shift often reveals compositions you might otherwise overlook.
Asymmetrical balance using rule of thirds grid overlays
The rule of thirds is one of the first compositional guidelines most photographers learn, yet its power lies in how you use it creatively rather than mechanically. Placing horizons, peaks or key foreground elements on third lines or intersections often produces a natural sense of balance, particularly in wide-angle landscape photography where symmetry can feel static. Asymmetrical balance—where visual weight is distributed unevenly but still feels harmonious—creates tension and energy that draw viewers into the scene.
Most modern cameras allow you to overlay a thirds grid in the viewfinder or on the rear screen, turning this concept into a practical field tool. You might position a lone tree at the lower left intersection while placing a distant mountain peak near the upper right, allowing negative space in the sky or foreground to counterbalance these anchors. The result is a composition that feels dynamic yet stable, much like a carefully choreographed dance rather than a posed group photo.
Of course, rules exist to be bent once you understand them. There will be times when centring a subject or using perfect symmetry is more effective, especially with reflections or strong geometric forms. However, when you are exploring a new location and searching for fresh landscape photography ideas, deliberately working with asymmetrical balance is a reliable way to avoid clichéd, centralised compositions and to give your images a more sophisticated visual structure.
Weather pattern analysis and optimal timing strategies
Weather is both the greatest ally and the biggest adversary of landscape photographers. The same storm system that grounds flights and closes passes can also produce the most spectacular light you will see all year. Learning to read forecasts, interpret cloud formations and anticipate atmospheric changes turns you from a passive observer into an active strategist on your photography trips. Instead of merely reacting to conditions, you can place yourself where the most interesting interactions between light and landscape are likely to occur.
Before departure, study seasonal climate patterns for your chosen destination: prevailing wind directions, typical cloud types, sunrise and sunset azimuths, and local microclimates. Apps and services such as satellite imagery, rain radar and high-resolution weather models allow you to track incoming fronts and identify windows of opportunity. On location, pay attention to subtle signals—the way wind shifts, the rate at which clouds build or dissipate, or the clarity of distant horizons. These clues often give you a 15–30 minute advantage, just enough time to move to a better viewpoint or adjust your plan.
Timing strategies extend beyond chasing dramatic storms. Some of the most productive sessions occur in the hour or two before and after official sunrise and sunset, when ambient light is soft and directional. On overcast days, you might pivot to intimate landscapes and details, using the diffused light like a giant softbox. By aligning your daily schedule with these windows—resting or travelling during harsh midday light and being on location well before the best conditions—you not only increase your success rate but also reduce the feeling of constantly rushing, which can lead to missed opportunities and safety oversights.
Post-processing workflows for landscape photography enhancement
Post-processing is where the raw potential of your landscape files is refined into finished images that communicate what you felt on location. A structured, non-destructive workflow ensures that you can revisit and improve your edits over time as your skills grow. For many photographers, this process begins in software such as Adobe Lightroom or Capture One, which provide powerful tools for global adjustments, cataloguing and batch processing—essential when you return from a two-week trip with thousands of frames.
A typical workflow might start with careful culling, using flags or star ratings to identify images with strong composition and technical quality. From there, global adjustments to white balance, exposure, contrast and colour grading set the overall mood. Tools such as graduated filters, radial masks and AI-powered selection brushes then allow you to refine specific areas—for example, darkening a bright sky, lifting shadow detail in a foreground, or subtly guiding the viewer’s eye towards the main subject. The goal is not to create a scene that never existed, but to faithfully interpret the dynamic range and atmosphere you experienced.
For more complex techniques such as focus stacking, exposure blending or advanced sharpening, pixel-based editors like Adobe Photoshop come into play. Here, you can combine multiple exposures to handle extreme contrast or depth-of-field challenges, retouch distractions, and apply targeted luminosity masks for fine control over highlights and shadows. Think of this stage as the digital equivalent of a darkroom: a place where craft and creativity work together. When applied with restraint and intention, post-processing does not diminish the authenticity of your work; instead, it helps your landscape photographs more closely match the way your eyes and mind perceived the scene.
Logistical planning and safety protocols for remote location photography
Even the most advanced camera kit and refined compositional skills are of little use if you cannot reach your locations safely and reliably. Logistical planning is the backbone of any successful photography trip focused on unique landscapes, especially when venturing into remote or mountainous regions. This planning begins with route research, permits and access rights, and extends to transport arrangements, accommodation, backup plans and emergency contingencies.
In practical terms, this means studying topographic maps and satellite imagery to understand terrain, elevation gain and potential hazards such as river crossings or avalanche zones. You should verify local regulations regarding drones, national park access and wild camping, as fines or confiscations can quickly derail a trip. Building realistic time buffers into your schedule allows for weather delays, road closures or spontaneous photographic opportunities without compromising safety. Whenever possible, travelling with an experienced local guide or joining a small, photography-focused group can drastically reduce logistical guesswork.
Safety protocols are not an optional extra—they are integral to responsible landscape photography. At a minimum, you should carry appropriate clothing layers, navigation tools (GPS and map/compass), sufficient food and water, and a basic first-aid kit tailored to the environment. In more remote areas, satellite communicators or personal locator beacons provide an additional layer of security should something go wrong beyond mobile coverage. Establishing simple rules, such as always informing someone of your planned route and expected return time, or turning back if weather or visibility drops below a predefined threshold, can prevent minor issues from becoming serious incidents. Ultimately, the most valuable images are the ones you live to capture another day.